
Seed Saving
Whether you’re new to seed saving or want to brush up on the time-honored practice, these seed-saving basics are a smart place to start.
Whether you’re new to seed saving or want to brush up on the time-honored practice, these seed-saving basics are a smart place to start.

Have you ever tried to save seeds from your crops? While the topic may seem daunting, anyone can do it! Not only is seed saving practical, it’s also very rewarding and essential for biodiversity preservation.

Why save seeds?
Saving seeds is integral to our mission at Seed Savers Exchange. It’s right there in our name! At our Heritage Farm headquarters, we steward a living collection of over 20,000 different varieties of seed crops, potatoes, garlic, grapes, and apples. Learn more about preservation at SSE.
There is inherent value in all of the seeds we work to protect. Some of the plants we preserve have a strong cultural history. Others possess unique culinary properties, and others display resilience to climatic events or invasive pests. Read seed stories from the collection.
By saving your own seeds, you play an important part in carrying out our collective mission. It’s up to all of us to lend a hand by saving and sharing seeds. Other ways to support SSE.
You don’t have to save seeds alone! By saving seeds, you join a community of countless other gardeners with similar interests. SSE facilitates the largest free seed swap between home gardeners like yourself. Through the Exchange, gardeners can request seeds from other gardeners, and list their own to share!
Saving seeds also gives you a special opportunity to make an impact in your own community. Join or start a local seed library, attend or host a seed swap, and connect with local gardeners!
Through the Community Seed Network, co-created by SSE, you can connect with other gardeners. You will also find extensive resources on creative ways to share seeds within your community.

How does seed saving work? We are here to support you! Keep reading to learn more about seed saving, and check out our crop-by-crop growing guides for information about saving seeds from specific crops.
Hybrids, which are created by crossing plants of two different varieties, generally do not produce offspring with the same traits as the parent plant. Seeds saved from open-pollinated varieties, on the other hand, will produce plants identical to the parent.
Seed Savers Exchange offers only open-pollinated varieties through its online and print catalog and on The Exchange, its gardener-to-gardener seed swap.
So what are open-pollinated varieties, and what is their lifespan? Open-pollinated varieties are like dog breeds; they will retain their distinct characteristics as long as they are pollinated (or “mated”) with the same “breed”/variety.
This means, with a little care and planning, the seeds you produce will be true-to-type, keeping their distinct traits generation after generation as long as they do not cross-pollinate with other varieties of the same species.
Open-pollinated varieties can be annual, biennial, and perennial.
Plants that flower, set seed, and die in a single growing season—like lettuce, tomatoes, and peppers—are called annuals.
Biennials, such as carrots and onions, don’t flower until their second growing season after they have gone through a cold period called vernalization.
Some long-lived plants, like apple trees and asparagus, are perennial, surviving and flowering for many years.
In biology, a genus is a taxonomy rank that groups together closely related species. For example, tomatoes (Solanum lycopersicum) are closely related to eggplants (Solanum melongena). In this case, Solanum is the genus that both tomatoes and eggplants belong to.
A species is a group of individuals that are able to reproduce together. All tomatoes belong to the species lycopersicum and are able to cross-pollinate (or transfer pollen between plants) with each other.
In the garden, most crops are different species from one another, but not always. There are several species of squash and two distinct species of kale—meaning some varieties of these crops are not able to cross-pollinate with each other.
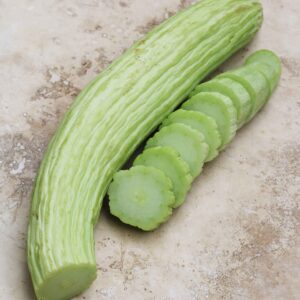
On the other hand, Cucumis melo, commonly categorized as a melon, also contains some varieties that are sold as cucumbers (like ‘Armenian’) because fruits of the variety are unsweet and sometimes pickled.
Planting just one variety in a species will help ensure you save pure seed. But if you want to save seeds from more than one variety, knowing your plants’ scientific name will help you determine which ones may cross-pollinate. To save pure seed, you want to prevent cross-pollination between two different varieties in the same species.
The squash commonly grown in the Seed Savers Exchange gardens at Heritage Farm, for example, could fall into one of three species: Cucurbita maxima, C. moschata, and C. pepo. These species won’t typically cross-pollinate.
On the other hand, Brassica oleracea includes broccoli, Brussels sprouts, cabbage, cauliflower, collards, kale, and kohlrabi, all plants you might think wouldn’t cross-pollinate but actually do. Read up on the cross-pollination habits of the plants you are saving seeds from to ensure you won’t run into issues.
The Seed Garden: The Art and Practice of Seed Saving is filled with advice for the home gardener and the more seasoned horticulturist alike and provides straightforward instructions on how to collect and save seed from your favorite heirloom and open-pollinated plants.
Understanding how garden plants are pollinated will help you prevent cross-pollination. Some plants will self-pollinate before the flowers are even open, making them less susceptible to cross-pollination. Examples of “selfers” are tomatoes, peas, and beans. (Take note that on occasion, insects can cross-pollinate “selfers.”)
Plants that are insect-pollinated (like squash or cucumbers) or wind-pollinated (like corn and spinach) are more likely to cross-pollinate.
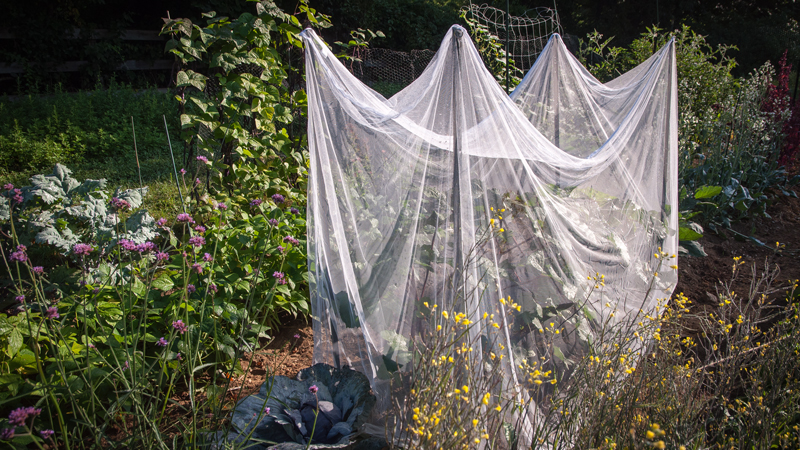
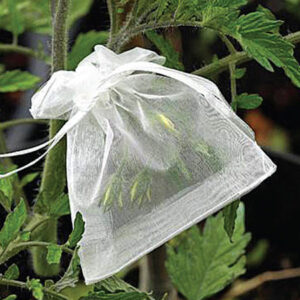
Keeping plants of the same species separated, or isolated, prevents cross-pollination and thus keeps seeds collected from open-pollinated varieties true-to-type.
Isolation by distance—which involves providing enough distance between a variety and any sources of contaminating pollen to ensure that the variety remains true to type—is the most reliable method.
Isolation distances for specific species can range from 10 feet to several miles. When isolation by distance isn’t possible, a little garden intervention may be needed to prevent unwanted cross-pollination between different varieties of the same species, such as containment or pollination barriers, hand-pollination, or timing of flowering.
Some fruits are market mature, or ready for eating, long before the seed is mature. Examples of these include carrots, cucumbers, eggplants, peas, green beans, summer squash, and cabbage.
Take carrots, for example—you pull this sweet root out of the ground after about two months for eating, and there is not much plant showing above ground. However, the seed is not mature for harvest at this point. The carrot plant, a biennial, must grow for a longer period so that the seed can reach the proper maturity. When you harvest the seed, a carrot plant can be up to four feet tall and one year old.
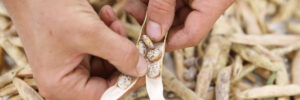
For this reason, seed savers need to leave a few plants of these crops to fully mature in the garden when they want to save seeds. The seeds of dry-fruited crops like grains, lettuce, and beans can be removed from the plant once they are dry and hard.
Beans & Peas: Pods should be brown, dry and brittle before harvest, and the seeds inside should be hard as rocks. If it is a particularly wet fall or you’re expecting an early frost, you may pull up entire plants and move them to a garage or basement to finish maturing and drying.
Corn: Husks should be brown, dry and brittle, the silks should be dark and dry, and the kernels should be extremely hard.
Cucumbers: Fruits must be left on the vine until they begin to turn yellow and their skin becomes tough. Seeds inside should be plump and firm.
Eggplant: Fruits should be left on the plant until they begin to turn yellow and their skin becomes tough. Seeds inside should be plump and hard (or crunchy if you’re chewing on them).
Lettuce: Two to three weeks after the lettuce flowers have opened, the seeds should be mature. Look for feathery parachute-like structures (think dandelions) before harvesting.
Melons and Watermelons: Harvest fruits as you would for eating and simply reserve some of the seeds or leave the fruits on the vine until they soften slightly (this may improve seed quality, but you won’t want to eat the melons at this point). Seeds inside should be plump and firm.
Okra: Pods should be brown and dry, and they will begin to split open when seeds are ready for harvest. The seeds should be very hard.
Peppers: Seeds are ready when the pepper fruit has matured to its final color.
Radishes: Pods should be brown, dry and brittle before harvest, and the seeds inside should be extremely hard.
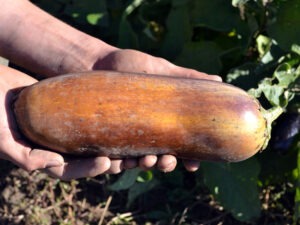
Squash: Fruits should be left to mature on the vine until the skin has become extremely hard. Harvest fruits before first frost and store up to two months in cool conditions (50-60 degrees) to allow the seeds to mature further. Seeds should be plump and firm.
Tomatoes: Seeds are ready when the tomato is ready to be eaten.
Remember to allow seeds to dry completely before storage. Any moisture in or around the seeds can cause mold and problems with germination.
When processing seeds, the goal is to separate the healthy, viable seeds from all other plant material, including immature or unhealthy seeds. Failing to do so may lead to disease, pests from insect eggs, and difficulty sowing the seed in the future.
Garden crops can be classified as either dry-fruited or wet-fruited.
Collecting seeds from dry-fruited crops, such as beans and lettuce, can be as simple as going out to the garden, handpicking a few mature seedpods, and bringing them into the house for further drying and cleaning.
Fruits from wet-fruited crops, such as tomatoes and squash, must be picked when their seeds are mature. Either crush or cut open the harvested fruit, and then extract the seeds from the flesh and pulp before the seeds are dried.
Saving seeds from dry-fruited crops is called dry processing. Processing dry-fruited crop seeds involves:
Depending on the crop type, you may harvest individual seeds/pods, seed heads or branches, or the entire plant. Harvest dry-fruited seeds when the seeds are as dry as possible on the plant and when most of the seeds on the plant are as mature as possible.
After harvest, allow the seeds to dry completely by spreading the seeds on trays or screens or hanging in mesh bags. Dry seeds in a cool, dark place with low humidity. Make sure the seeds have good airflow and keep them safe from moisture or pests.
Thresh, or separate, the fruits and seeds from the harvested plants, often by beating, flailing, treading on, rubbing, or shaking the plants. Apply force and friction to extract the seeds.
Separating seeds from the plant material can involve screening and winnowing.
Screening: This process involves using colanders, hardware cloth, screens, or other similar tools to separate seeds from chaff (unwanted plant material) or to grade seeds by size.
Winnowing: This process involves using air currents or wind to separate seeds from chaff.
After completing these steps, continue to dry the seeds.
Saving seeds from wet-fruited crops is called wet processing. Processing wet-fruited crop seeds involves:
Harvest the fruit from the plant at seed maturity. For many crops, fruits reach seed maturity after they undergo a change in color and/or firmness and detach easily from the plant.
Some crops, such as squash and cucumbers, grow seeds inside a cavity in the fruit. For these crops, slice the fruits in half and scoop out the seeds.
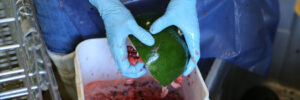
Some crops, such eggplant and watermelon, contain seeds throughout the flesh. Methods of dislodging these seeds include slicing and squeezing the fruits, stepping on the fruits, or even blending the fruits in a food processor.
Soaking: Some crops, such as squash and melon, benefit from soaking their seeds in water prior to rinsing. Soaking, while not necessary, helps make the seeds easier to separate from the rest of the plant material, including pulp and immature seeds. Cover the seeds with water and soak in a cool, dark place for 4-12 hours.
Fermenting: Some crops, such as tomatoes and cucumbers, require a period of fermentation prior to rinsing. Tomato and cucumber seeds are enveloped in a gelatinous coating that must be broken down by microbes in order to be rinsed away. Let these seeds sit in their own juices and pulp for 1-3 days in a cool place and away from sunlight, mixing occasionally.
Decanting: Decanting involves pouring out a mixture of pulp, seeds, and water to “float off” the unwanted pulp and lighter, immature seeds. The dense, mature seeds will sink to the bottom. Repeat this process until only viable seeds remain.
Only decant crops with seeds that sink, such as tomatoes. Cucumber, eggplant, and some squash seeds float and will not benefit from decanting.
Rinsing: All wet-fruited seeds need to be thoroughly rinsed. Rinse seeds with water from a garden hose, sink sprayer, or faucet through a colander, strainer, or screen. Rinse away as much plant material as possible.
Dry the seeds in a cool, dark, dry place with good airflow. Spread the seeds in a single layer on screens, coffee filters, sheet pans, or plywood. The seeds are dry when they can be easily snapped in half or shattered when crushed. Seeds that bend, squish, or smash need more time drying.
Dry the seeds as soon as possible after rinsing to prevent mold or germination.
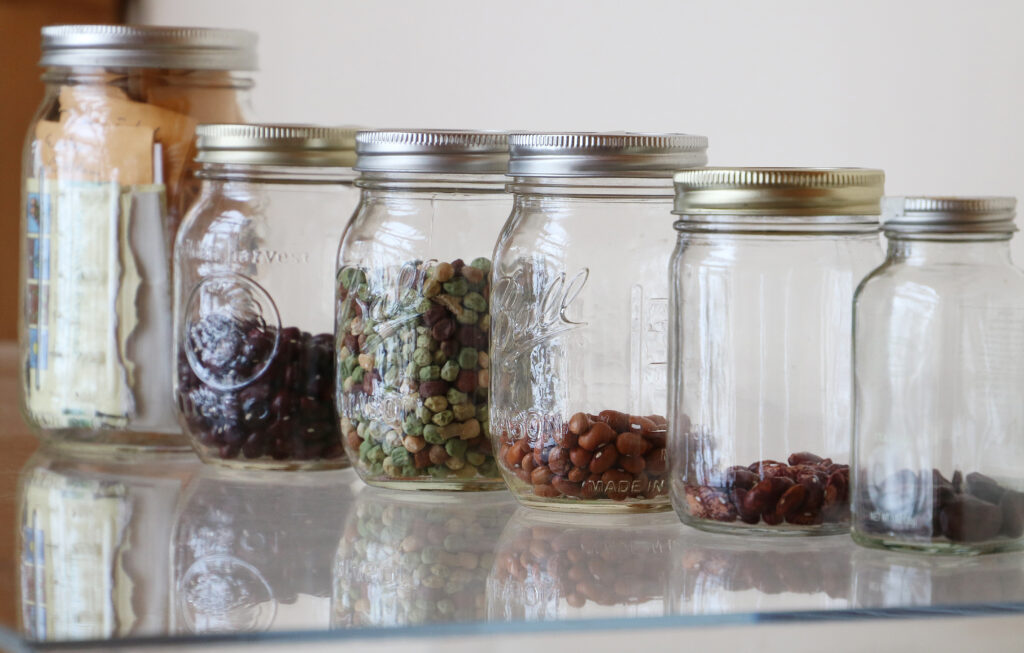
Seeds are happiest when they are stored in a cool, dark, and dry place. A dark closet in a cooler part of the house or a dry, cool basement are both good spaces to store seeds for a year or two. Once properly dried, seeds can also be sealed in airtight containers and stored in the refrigerator or freezer for several years.
The seeds of some crops are naturally longer lived. Tomato seeds and beans can be left for many years in adequate storage conditions, while onion and carrot seeds are notoriously short-lived.
Don’t forget to label your seeds with the crop type, variety name, any useful notes about your seed source, date you harvested the seeds, and number of plants from which you harvested seeds.
Instructional Videos
Processing seed is the step between harvesting and storage. Tomatoes, squash, peppers, watermelon, and legumes are great options for people new to seed saving. Watch the instructional videos below to learn the ins and outs of seed processing


Keep Learning
Keep learning with specific crop-by-crop growing and seed saving guides, and sign up for Virtual Seed School in fall 2025.